Quickstart
This guide walks you through the full p0 workflow in seven steps — from signing in to shipping production code. By the end, you’ll have brainstormed a feature with AI, watched it get built, and merged a pull request.Your first feature
Sign in
Open the p0 desktop app and sign in with your Purple account. If you don’t have an account yet, switch to the Create Account tab to register.New to p0? See the installation guide to download the app for your platform.
Create a workspace
Click New in the workspace picker to launch the creation wizard. The wizard walks you through:
- Template — pick a starting template (Full Stack, Backend, Frontend, etc.) or start blank
- Team — select which Purple team owns this workspace (auto-skipped if you belong to one team)
- Name — give your workspace a name. p0 creates a folder at
~/.purple-code/workspaces/{name}/automatically - Repositories — browse and select GitHub repositories to include (optional, you can add repos later)
- Plugins — choose workspace plugins (optional)
- Review — confirm your selections and create the workspace
Create standards
When you first open a workspace, p0 analyzes your connected repositories and auto-generates coding standards based on the patterns it finds — naming conventions, file structure, test practices, and more.Review the generated standards and adjust anything that doesn’t match your team’s preferences. These standards guide every line of code p0 writes, so getting them right pays off immediately.
Brainstorm a feature with AI
Start a new session and describe the feature you want to build. For example: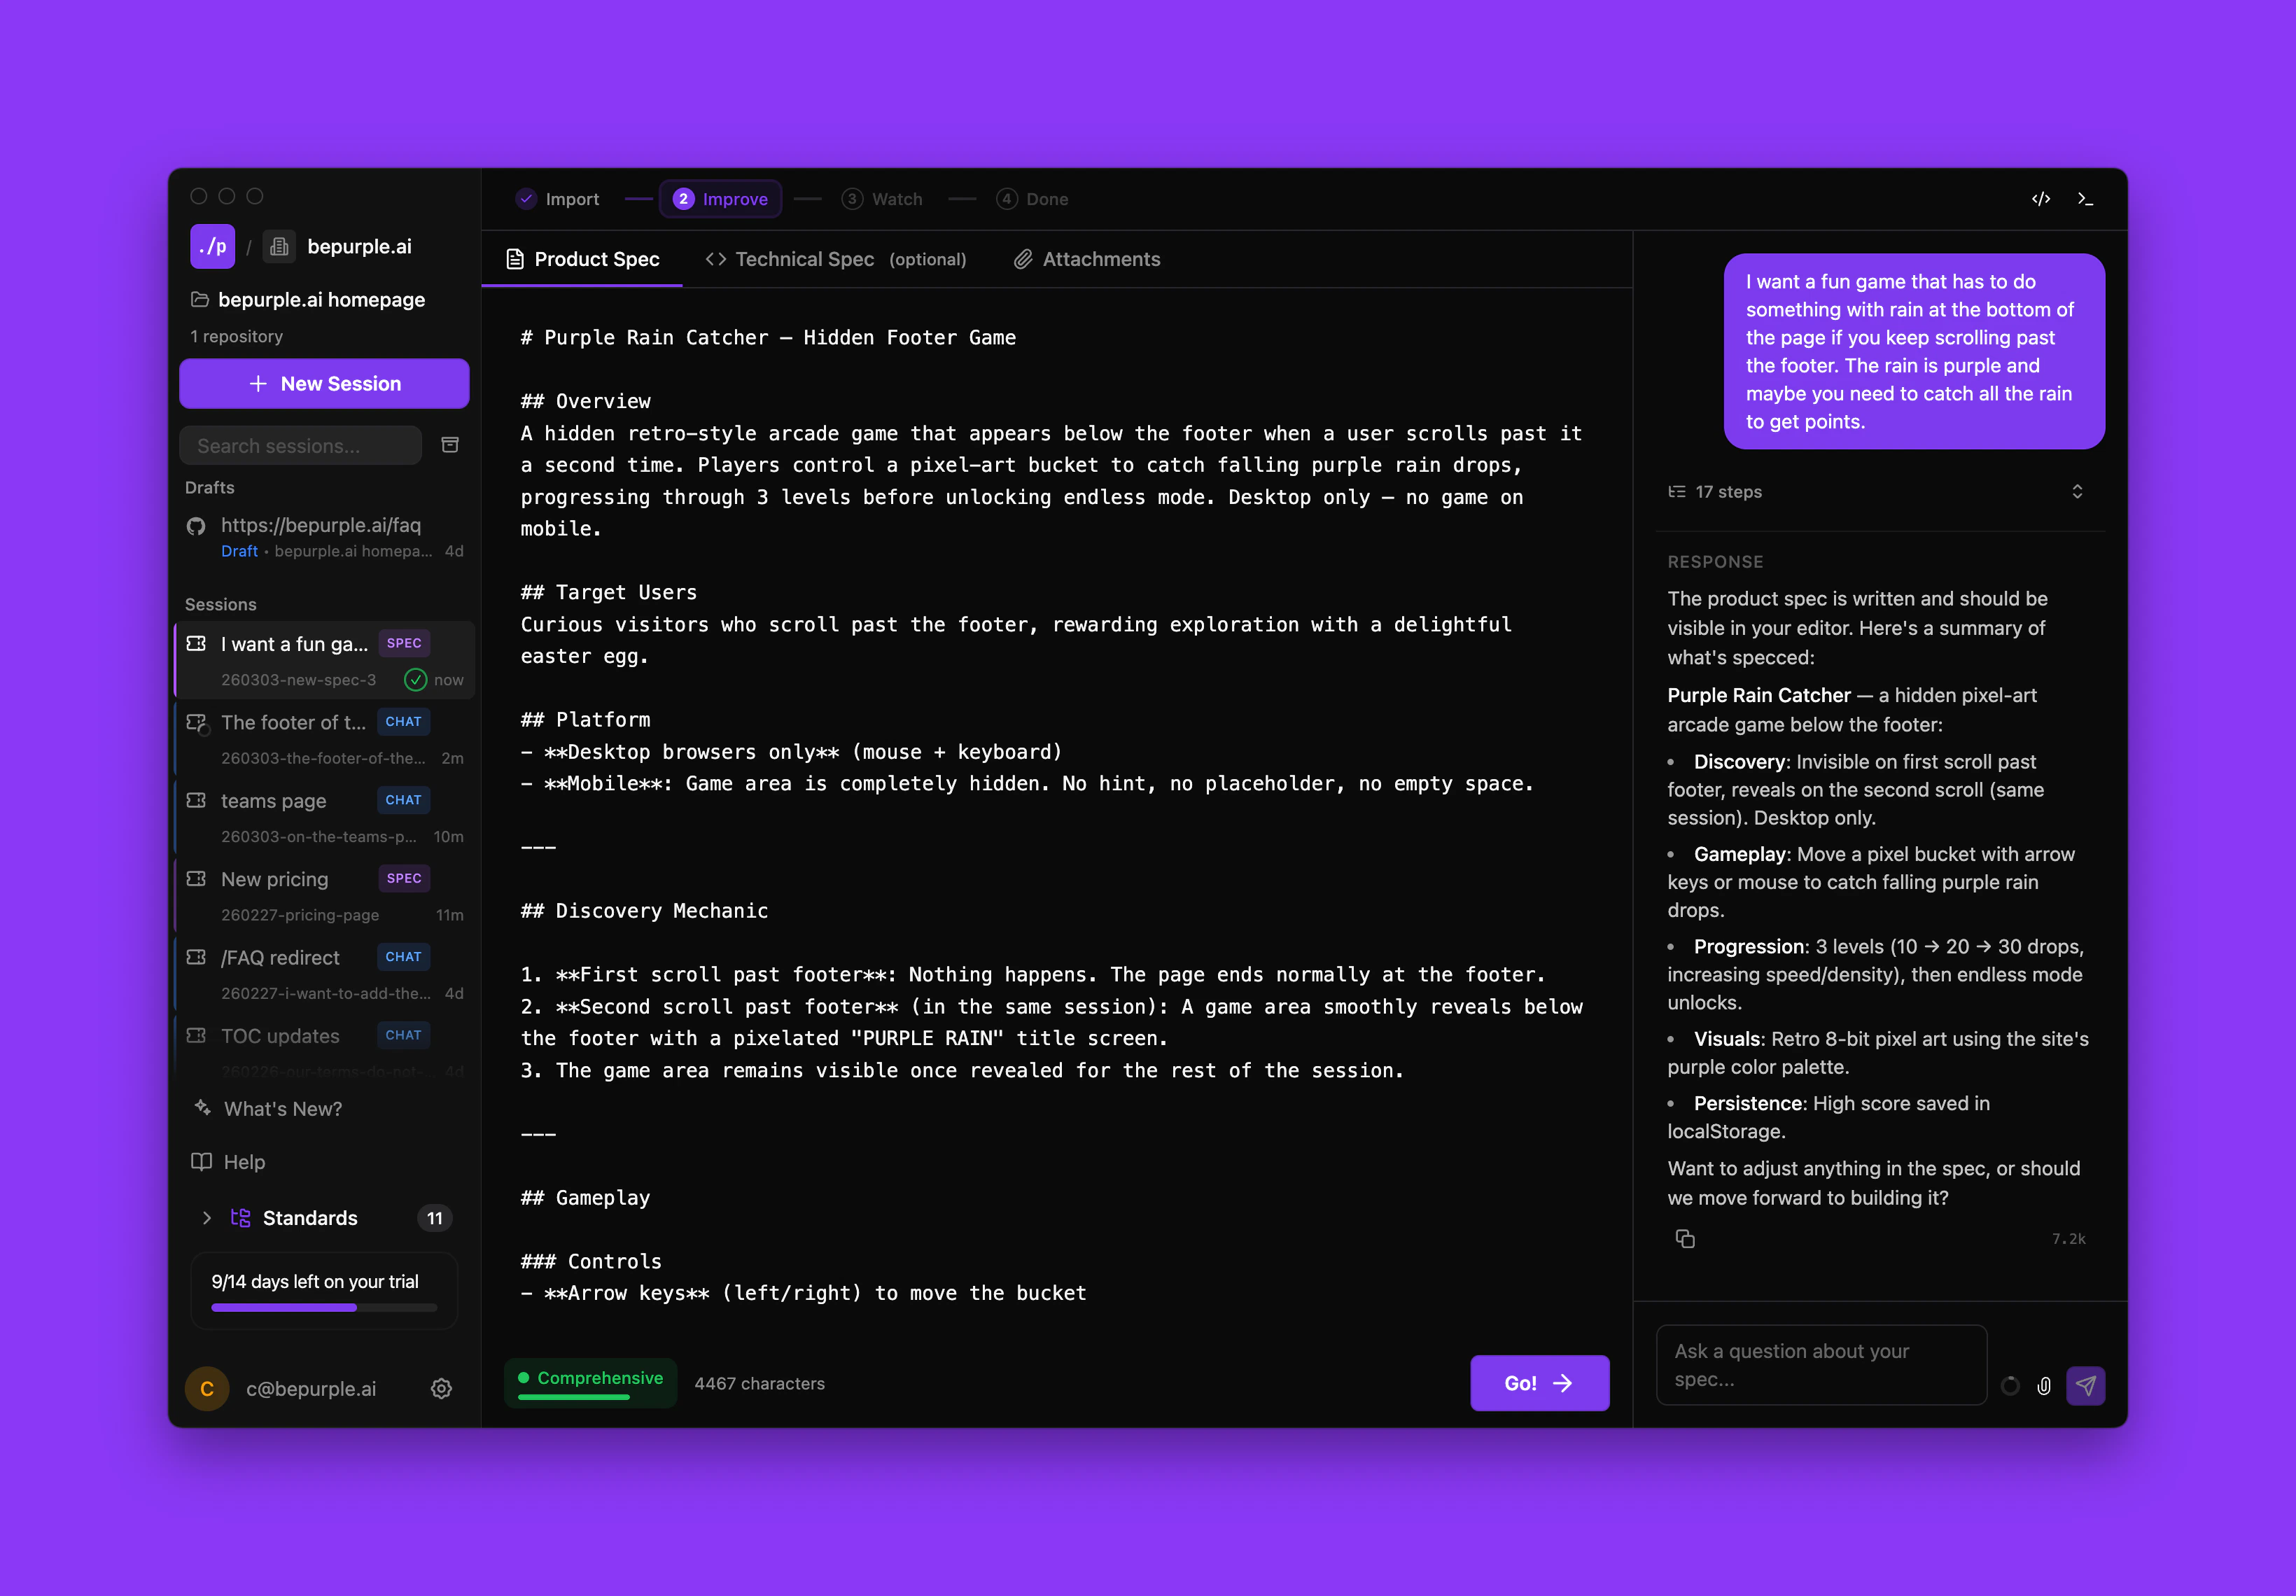
“Add a user authentication endpoint with JWT tokens and refresh token rotation”p0 enters Spec Mode, where it collaborates with you to shape the idea into a clear product spec:
- p0 asks clarifying questions about scope, edge cases, and requirements
- You refine your answers and add details
- p0 drafts a complete product spec based on the conversation
Build
Once you approve the spec, click Go and p0 starts implementing. You get full real-time visibility into the process:
- Ticket tree — see every task broken down and tracked as p0 works through them
- File changes — watch files get created and modified in real time
- Terminal output — follow command execution and build results live
Create PRs and review code
When implementation is complete, p0 creates pull requests in your connected git provider. From here you can:
- Review diffs to verify the implementation matches the spec
- Leave comments and request changes just like any team code review
- Collaborate with teammates on the PR before merging
- Run your CI pipeline to validate tests and checks
What you just learned
In this quickstart, you:- Signed in and created a workspace connected to your repositories
- Let p0 generate coding standards from your existing codebase
- Brainstormed a feature in Spec Mode and reviewed the product spec
- Watched p0 build the feature with full visibility into every change
- Created pull requests and reviewed the generated code
- Merged and shipped your first AI-built feature
Next steps
Core concepts
Understand workspaces, sessions, modes, and the spec-driven workflow
Workspace overview
Learn how to configure and manage workspaces
Workflow overview
Explore the full spec-driven pipeline from idea to pull request
Coding standards
Define and customize how p0 writes code for your team